Showing posts with label DIY. Show all posts

2.01.2013

DIY: Heart Polka Dot Jeans


Hey guys, ready for another DIY? I saw these Heart polka dot jeans on Pintrest & I had to make them. 


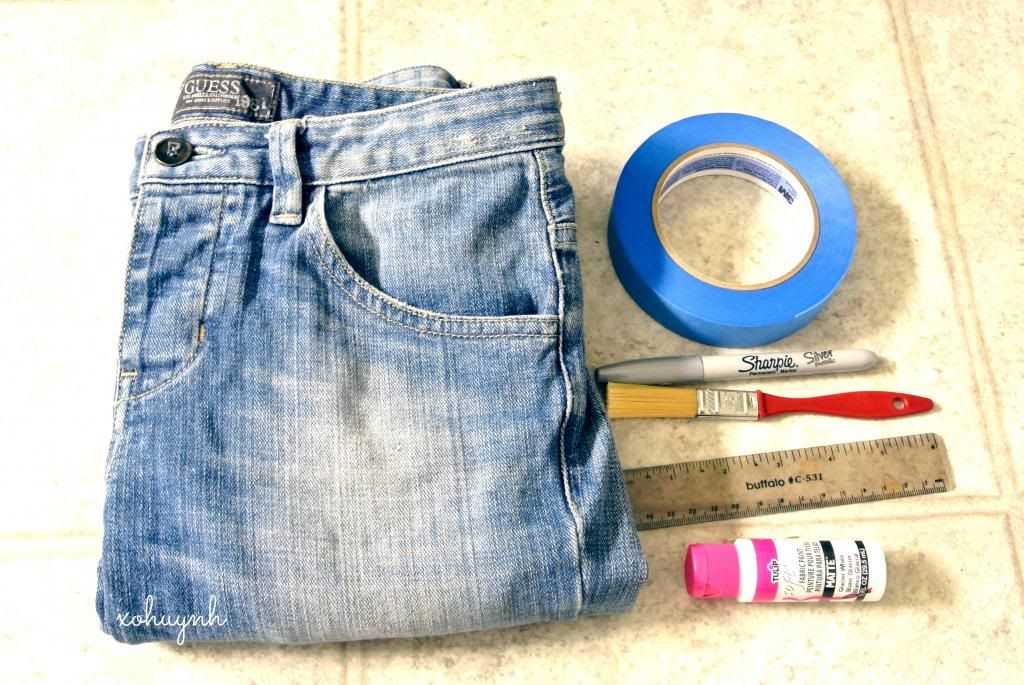
The materials: 
Old jeans
Painters tape
Marker
Ruler
Paint brush or sponge
Fabric paint
Ruler
Measurement tape ( forgot to but this in the picture )
Scissors (forgot this one too)


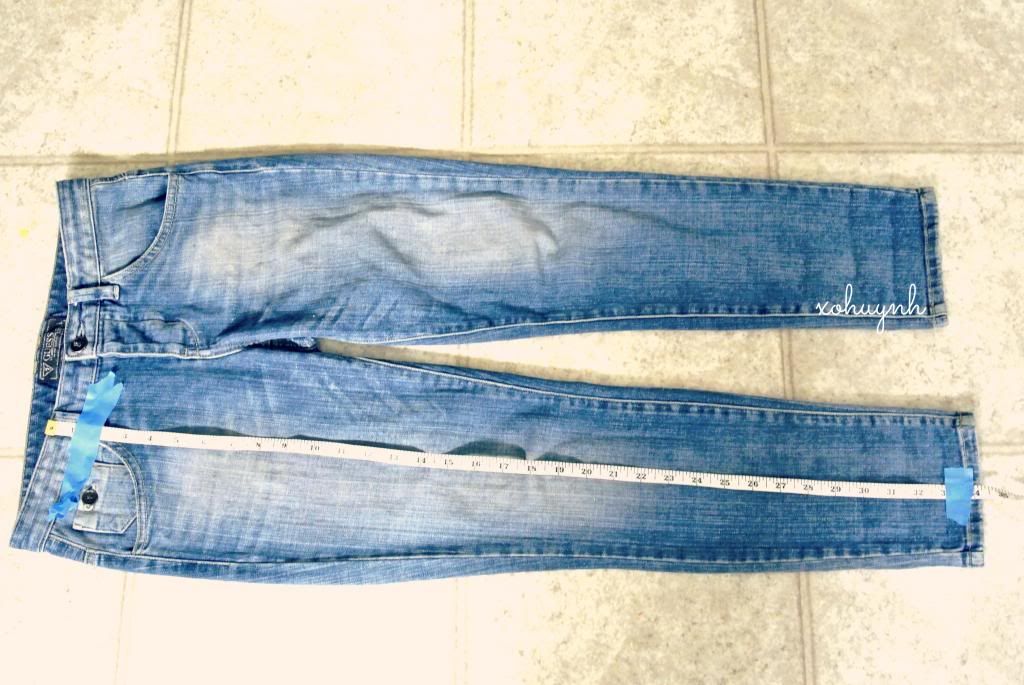
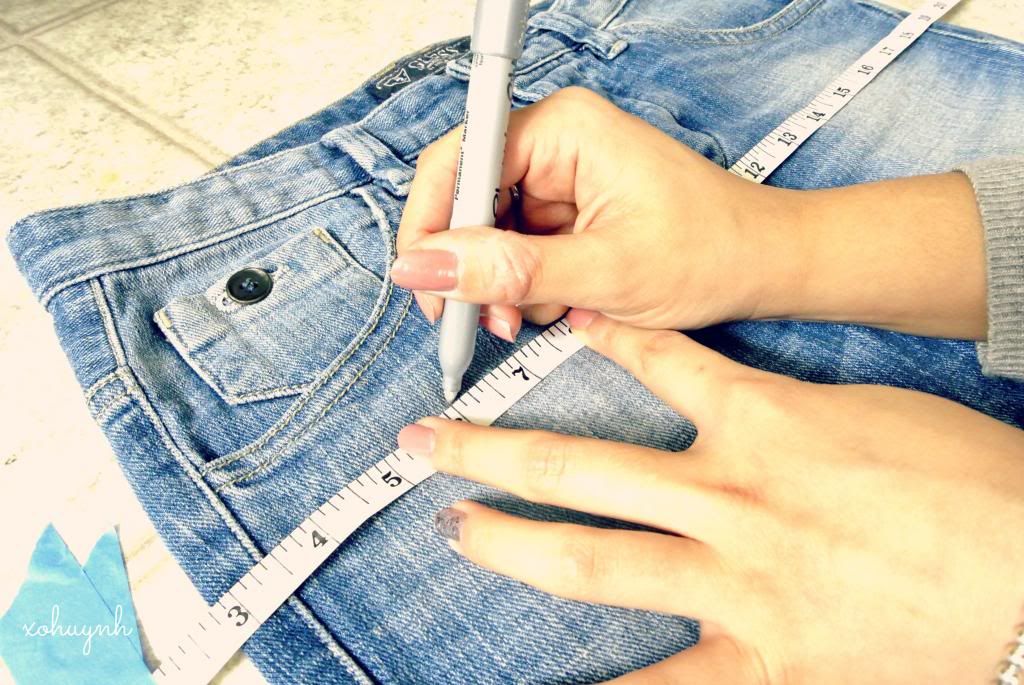
First you want to lay out your jeans flat and than find the middle on the with the measuring tape. Line it up straight and tape it your jeans so the measuring tape won't move around. Now, start making dots every 4 inches down. 


Next, line up the measuring tape so it's under your first marking and make a mark for every 2 inches across. Do that for all of the previous vertical dots. You should have a simple grid throughout your first leg, the spacing should be 2 inches apart horizontally and 4 inches apart vertically, an imaginary rectangle basically   

[for the next step you can use your ruler or measuring tape for your next marking, I however, just eye balled it.]

Now, you want to find the center of the rectangle and make a mark. In theory, each marking/dot should now be 2 inches apart from each other, vertical, horizontal and diagonal.  

Repeat all of these steps on the other leg. 


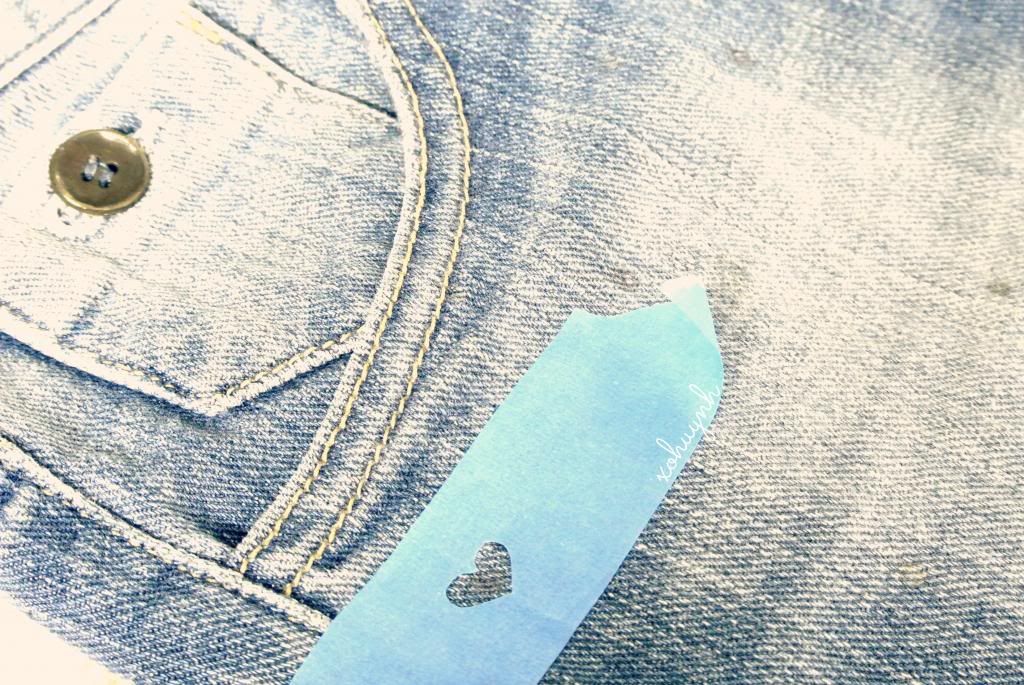
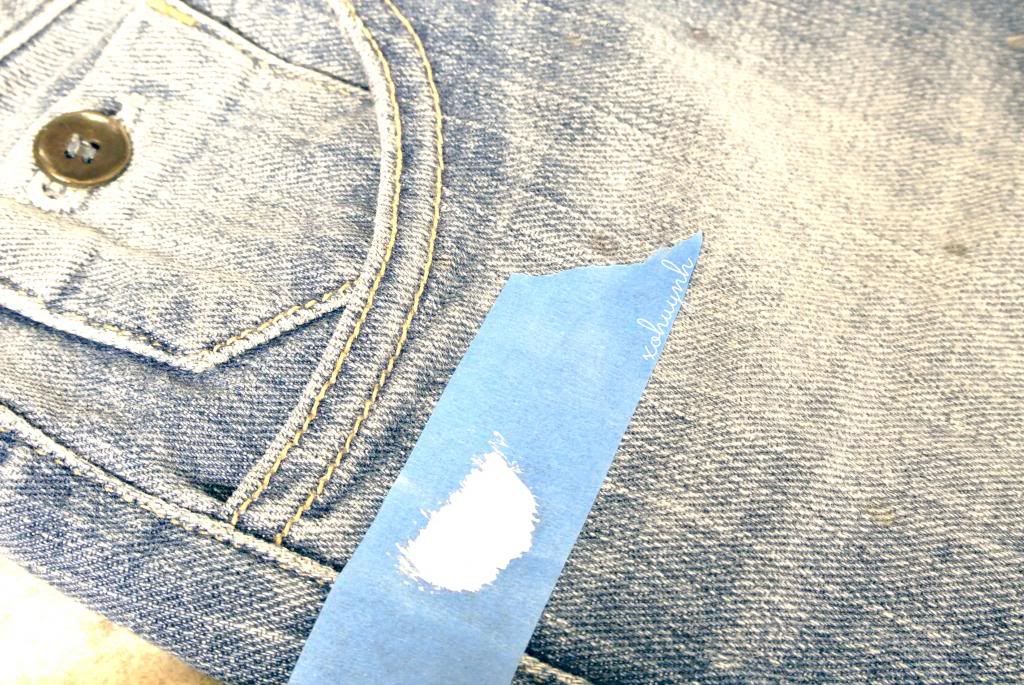
Now take the painters tape, fold it in half and cut out a heart. Tape it over the dots you made.


& dab paint over it. 


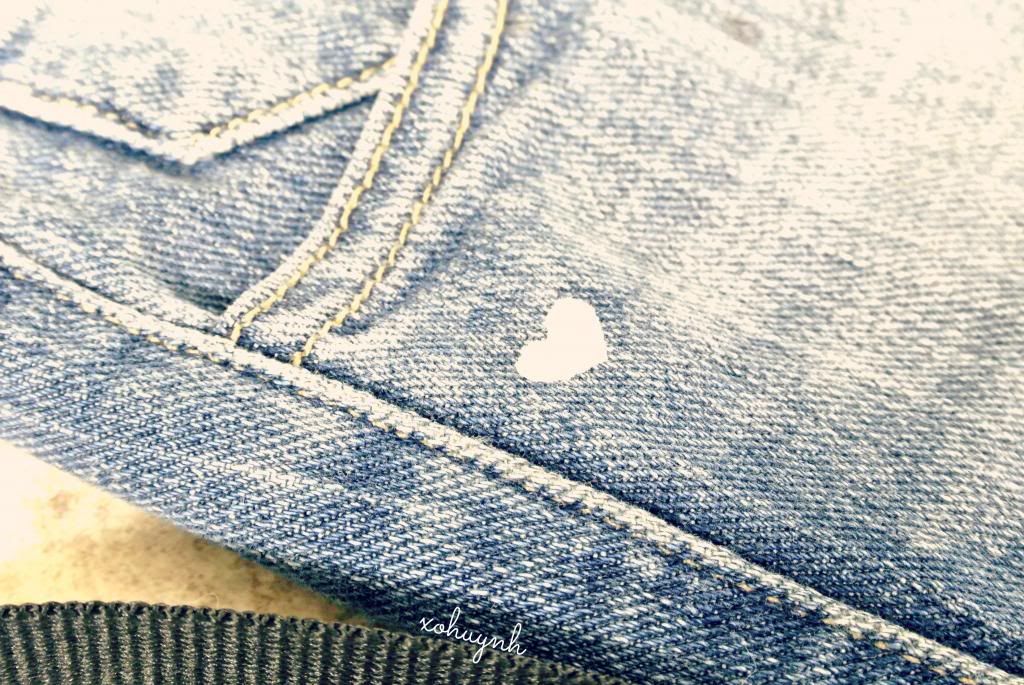
Peel off the tape, repeat & let it dry. That's it!! Don't worry about making mistakes, no one will notice! 


Enjoy guys!


What am I wearing?
Blazer : Guess
Top : Forever21
Necklace : Tiffany & co
Jeans : Old Guess Jeans
Watch : Guess

1.31.2013

Next DIY


Here is a sneak peak at my up & coming DIY. Stay tune! =)

1.28.2013

DIY: Dolce & Gabbana Floral Sunnies


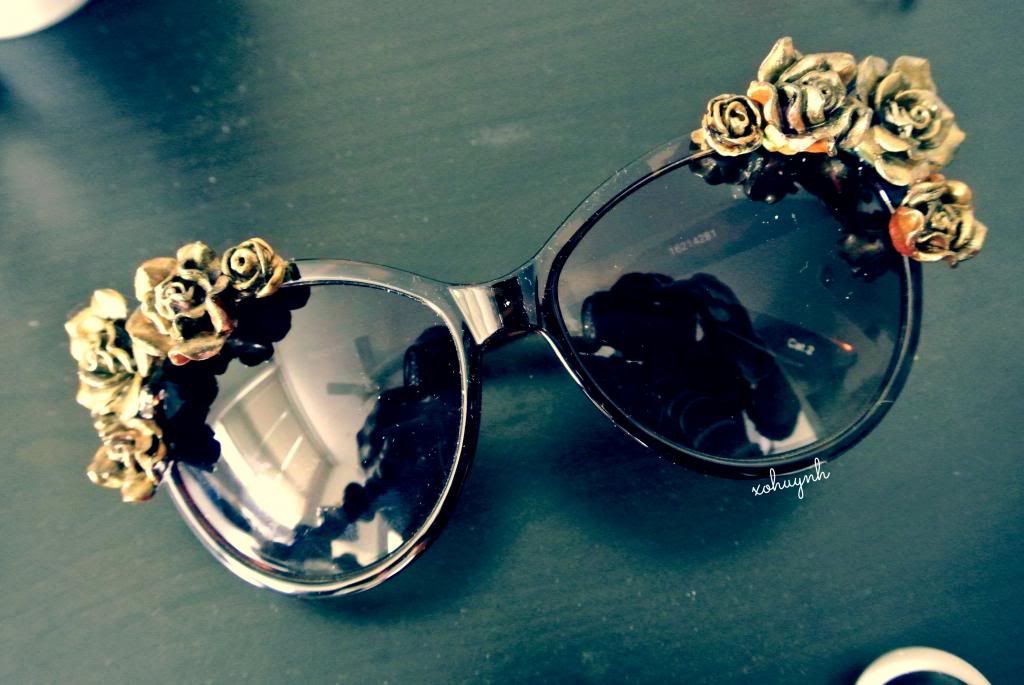
Hi loves, today is a DIY kind of day. I'm going to show you guys, how easy it is to make a pair of D&G inspired floral sunglasses, without the price tag of...$500?  


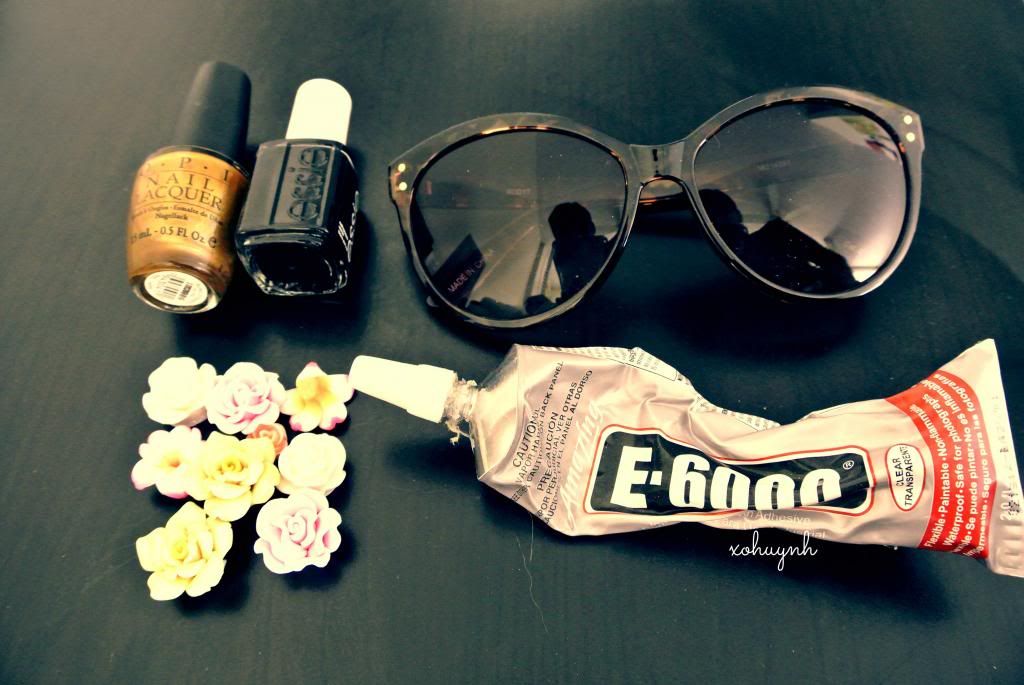
Ok, the supplies you will need is:
Strong glue - I recommend  E6000.
Cheap pair of shades. - I got mine at Forever21 for $6.50.
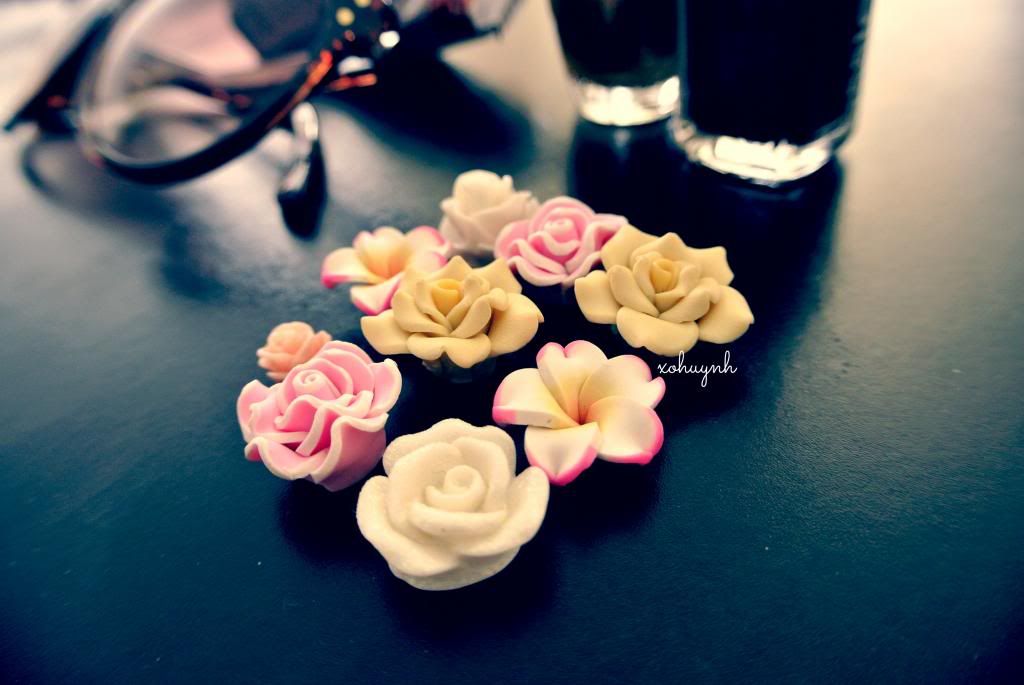
Cabochon/Polymer Clay Flowers. - I ordered mine at Etsy for under 5 bucks.
Nail polish. - Optional.


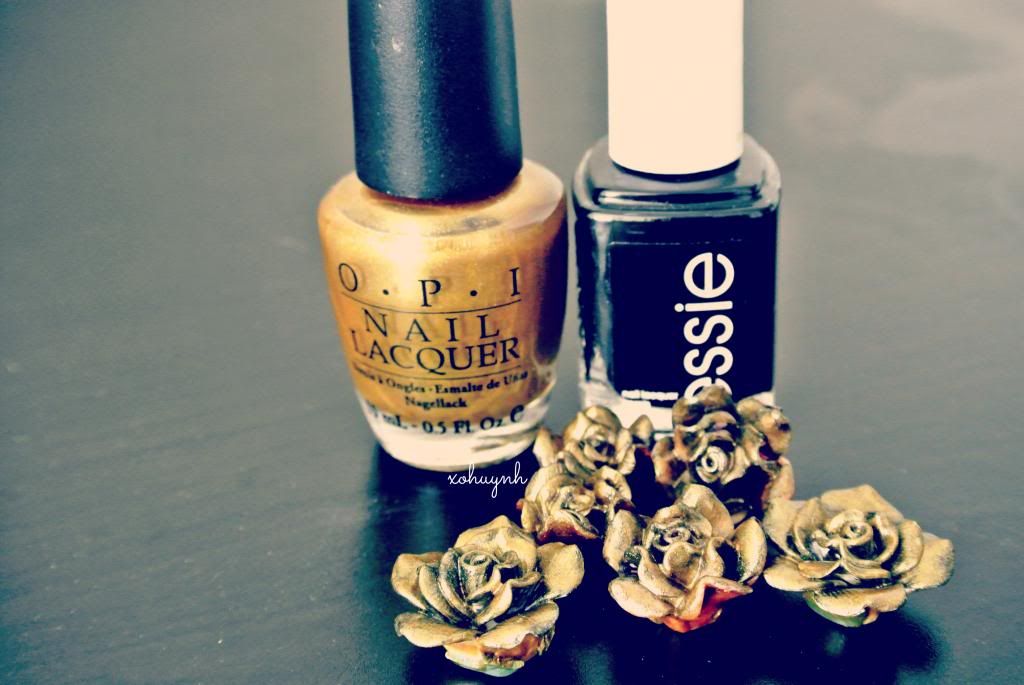
I didn't like how the pastel flowers looked against my glass frames, so I decided to turn then gold...with nail polish!!! You guys don't have to follow me & paint the flowers of course, remember, you are the boss of your DIYs. 


I used a black and gold nail polish to give the flowers an antique vibe to them. All I did was dabbed a few black polish around the roses and topped it off with 2-3 coats of gold polish. & after they finish air drying, all is left it to glue them on! It's that easy. I do recommend planning where you want to put the flowers first, and than gluing it in a well ventilated area.  


&&& the finished product! How expensive do these look? =P 


1.25.2013

UPDATED: Iced Out Nikon J1


Hey guys, remember the post I did back in August 2012 about me blinging out my camera? Well I finally finished it! It took like 5 months but I finally got off my lazy butt and finished the darn thing. & this is how it turned out. Impressed? I think so!

Want to know the materials I used? Clink the link. > Iced Out Nikon Post <


Here are some pictures of my camera with flash. These pictures cannot describe how shiny it is. 


10.25.2012

DIY Ring Holder

Guess what I made last night! I created myself a ring/watch holder.


What Did I use?
-Shoe box lid
-The BF old black tee's 
-Glue gun 
-Scissors 

Yup, that was every thing I use. 
How did I make it?
All I did was cut up the t-shirts into strips, rolled it into a spring roll and glued it. That's it! Super easy!

Here are some more Instagram pictures.


I did all of that while drinking coffee lol.


Here are also some actually pictures. Not bad eh? I was thinking about making myself an earring holder and a bracelet holder soon. I saw some ideas on Youtube that I might be willingly to try. 


This was SUPER EASY to make so, give it a try. =)

7.06.2012

DIY: Customize Toms

I've been meaning to post this entry for sometime now & well here it is. =) I made these for Lisa's birthday a few months ago and I thought it was a good idea to make a DIY post.
 

Materials:
Toms
Rhinestones
Glue (E-6000 is recommended)
Nailpolish
Dotting tool
scrap paper
tweezer


So, your gonna wanna glue the rhinestones on the toms. I dipped my rhinestone in glue first than applied them. I only wanted to do the tips so I used the line that was going diagonally on the toms as a guide line.


After that I just took my nail dotting tool, dipped it in silver nail polish and dotted it between each rhinestones. Lol as you can see I messed up on one...Oh well it gives it character. >.0


And TADAH!!! It is done. Enjoy.

2.04.2012

Old Denim? New Shorts!


It's a Friday night and I'm bored! The boyfriend left me to go watch the Woman in Black and I didn't want to go cause I'm a pussy lol. I actually haven't seen a scary movie in like 3 and a half years. So instead I'm home all alone...='(

A few weeks ago I had ordered 200 cone shaped studs, from  studsandspikes.com and I haven't got the chance of studding anything yet. So since I had nothing to do on this Friday night...I know I'm a loser! Always have been so It doesn't bother me LOL. I was determined to find something to stud!& I came across my black ripped Zara Denim which I only got for like $19.99 btw. And I was like MEHH! I haven't worn these in ages...and than a light bulb lit up in my head. I should turn this into shorts! and add studs!

Oh, and sorry for the poor quality pictures, I uses my iPhone 4 to take picture of everything because my actual camera has been broken for quite some time now. =S

Purchased at Zara for like $20. Gotta love Zara sale!


Tip for making your own shorts. Cut it a bit longer and on an angle. Or better yet, just youtube it! There is a how to video on EVERYTHING! No jokes...

And this is how my new shorts looked! I rolled up the bottom for a more clean look. 

Pretty darn cute I must say! 

silver studs: Tall English 77 silver Studs
I got 100 for $4.22
black studs: Black Metal English 77 Studs 7/16"
I got 100 for $4.22

At first, I was pretty indecisive cause I didn't know where exactly I wanted to stud. 

& of course being the idiot I am, I decided to outline the pockets with studs...The toughest spot ever to do! I actually broke a nail over it because I couldn't get the studs through lol. FRICK! 

ANYWAYS! This is the final product...I think. They sorta look a LITTLE plain to me, I dunno if I'm gonna continue studding or not, but I'm quite pleased with my new shorts.

2.01.2012

Want Pretty Long & Strong Nails?

Hey peeps! Okay so, I'm gonna make this post about taking care of your finger nails and how to make them stronger and longer! I'm gonna show you guys what is in my nail care kit and and what I do step by step.


Sooooooo...I usually do my nails every 2 weeks but I have ran out of nail polish remover for quite some time now and have not done anything to my nails in like a month and a half. And after cutting my nails for the first time in 2 months and removing my previous nail polish, this is what my hand looks like.
I know! I KNOW! My nails are DISGUSTING!
 
So yea..don't be afraid! You can TRUST me completely! I swear you'll see beautiful results in the long run! My nails only look like that because I like to pick my nail polish off. Which is a DO NOT! Because it makes your nails thinner!!! Also because I have been neglecting my hands throughout December and January.

ANYWAYS. This is what my nail care kit consist of. 
Everything you will need! and nail polish remover. =)
I know it's sorta a lot but do you want pretty nails or not?! Than don't QUESTION my wisdom!


Purchased at Walmart

As nail polish remover, I like to use 100% acetone, just because it gets the job done real quick. This one is maximum strength so it does the job even quicker!


Best nail filer EVER! lol I think I need a new one.


Purchased at Shopper Drug Mart
After cleaning my nails, I like to shape them. I usually don't cut my nails unless it's broken or really long. Anyways lets take a minute to talk about this nail filer lol. I LOVE this Revlon Shape 'N' Buff nail filer because it has numbers & steps, as you can see and it tells you what the different surfaces are for. I remember seeing ones that don't tell you and it's just like a blank block with colors on it and I was like "WTF are these for? Decoration?" anyways go buy one.


After I am done shaping and buffing my nails, I use a cuticle scraper to push back my cuticles and to scrape off skin that is lingering around my nails.
Purchased at Shopper Drug Mart
Gently push, it doesn't hurt one bit. You can cut your cuticles if you want but I don't.
After that I put on cuticle oil on my cuticles and massage it into my nails for a good minute, I rinse with water and dry my nails. Make sure you dry your nails completely or nail polish will not stick. Apply cuticle oil is very IMPORTANT because that is what makes your nails grow. 
Sally Hansen Vitamin E Nail & Cuticle Oil. Purchased at Shopper Drug Mart.
Just apply on your cuticles, not your entire nails.
This next step is optional.
Sally Hansen 2-en-1 Nail White Pencil.

This step is optional because all it does is makes your nail tips look whiter. I only use this when I have my nails bare. When I paint my nails, my tips are hidden. So it doesn't matter, unless you have super yucky dark yellow tips.

After that is all done, I use a nail strengthener polish. 

Sally Hansen Diamond Strength Hardener. Purchased at Shopper Drug Mart.
This Strengthener could be worn alone for a bare look or as a base coat before you apply nail polish. I like to apply 2 coats because one coat doesn't make my nail surface smooth enough for me. & In the long run, you will notice your nails are stronger and healthier. =)
Looking better already!
And after all that crap is done! FINALLY! I put on hand cream. This hand cream is amazing because it has lots of goodies in it to help my nails grow and make my skin soft at the same time. It's like a magical cream for hands!

Purchased at Shopper Drug Mart
And that's it! This ENTIRE process takes me about 15 minutes to do so its not that too bad...and it's a lot cheaper than going to the nail salon every 2 weeks. =D

Related Posts Plugin for WordPress, Blogger...
Designed by Jackie's Design Studio